Moab 7 Day Itinerary: Off-Road Adventure & Epic Views
Moab is a high-octane playground for off-roaders and scenery chasers alike. If you’re looking to blend red rock crawling with peaceful overlooks, this Moab 7 day itinerary hits the sweet spot—trails like Hell’s Revenge, Fins & Things, and Shafer Trail balanced with iconic viewpoints, strategic rest, and practical stops.
Here’s how to make the most of a week in Utah’s desert backcountry.
Table of Contents
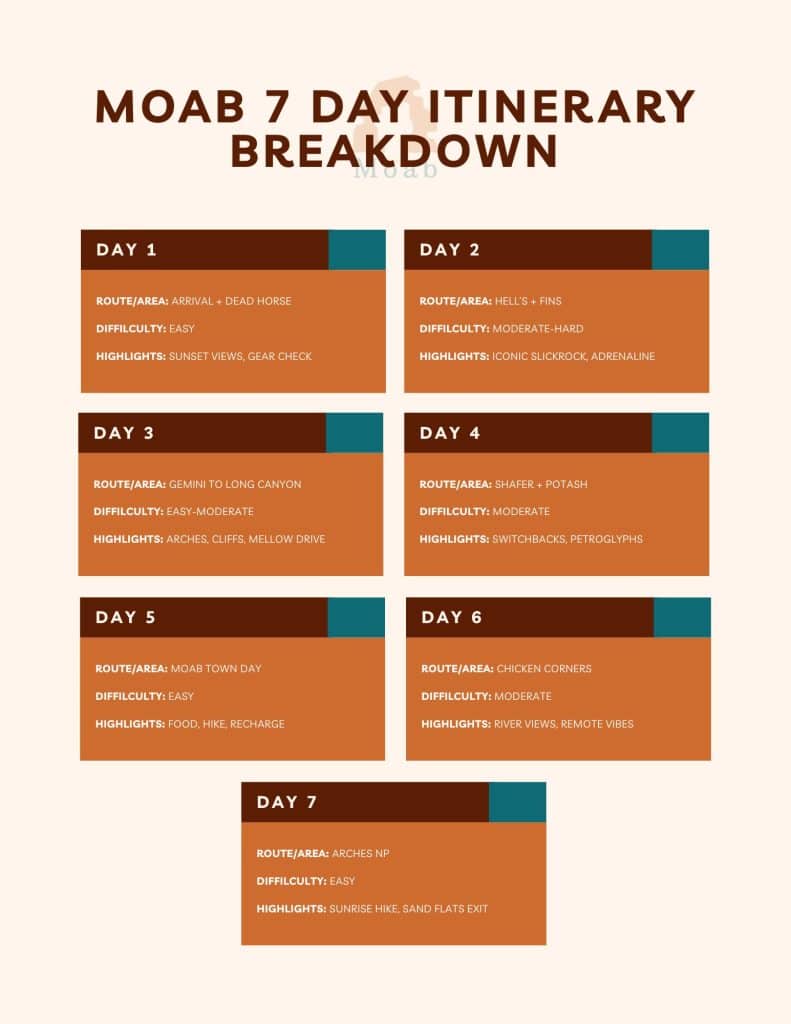
TL;DR: Your 7-Day Moab Off-Road Plan
- Day 1: Arrival, gear check, groceries, sunset at Dead Horse Point
- Day 2: Hell’s Revenge & Fins & Things (4×4 playground)
- Day 3: Gemini Bridges to Long Canyon
- Day 4: Shafer Trail Views + Potash Road
- Day 5: Rest Day in Moab
- Day 6: Chicken Corners + Hurrah Pass
- Day 7: Arches NP sunrise + Sand Flats exit
Arrival & Logistics (Day 1)
- Groceries: City Market, Moonflower Co-op
- Fuel: Fill up in town (Shell/Walker)
- Gear Check: Moab 4×4 Outpost, ARB, or Tread Lightly!
- Permits: No special permits for most trails unless camping
- Sunset Spot: Dead Horse Point — wide views, lower crowds than Mesa Arch
Hell’s Revenge & Fins & Things (Day 2)

Start early to beat the Jeep safari crowds.
- Hell’s Revenge: Iconic slickrock route with steep climbs (Hell’s Gate is optional)
- Fins & Things: More flowy, scenic, less risky
- Key Viewpoints: Sand Flats panorama, La Sal Mountain overlook
- Lunch Option: Pack in, or quick stop at Love Muffin post-ride
- Sunset: Rotary Park picnic or Mill Creek Parkway walk
- Backup Plan: Rain makes slickrock dangerous — opt for town hike or scenic drive
Gemini Bridges to Long Canyon (Day 3)
- Morning: Start west of town on 191 — Gemini Bridges offers a short hike to twin spans
- Afternoon: Loop down Long Canyon Road, framed by towering walls
- Add-ons: Pucker Pass (weather dependent), Jug Handle Arch stop
- Food/Fuel: Pack lunch, refuel at Chevron or Shell back in town
- Sunset: Kane Creek overlook pullouts
Shafer Trail Views (Day 4)
- Start: Enter via Canyonlands Island in the Sky
- Viewpoints: Gooseneck Overlook, Shafer Switchbacks, Thelma & Louise Point
- Descent: Tight switchbacks with jaw-dropping exposure
- Exit: Potash Road back to Moab (petroglyph pullouts + wall climbers)
- Lunch: Sandwiches with a view; Moab Brewery after
- Sunset: Potash boat ramp or Red Cliffs Lodge
Rest Day in Moab (Day 5)
- Easy Hikes: Corona Arch, Grandstaff Canyon (morning shade)
- Foodie Stops: Quesadilla Mobilla, Jailhouse Cafe (brunch), Thai Bella
- Shops: Back of Beyond Books, GearHeads (great water refill)
- Wellness: Massage at Spa Moab, yoga at Moab Yoga
- Bonus Sunset: Wilson Arch (drive-up), or Castle Valley scenic byway
Chicken Corners + Hurrah Pass (Day 6)
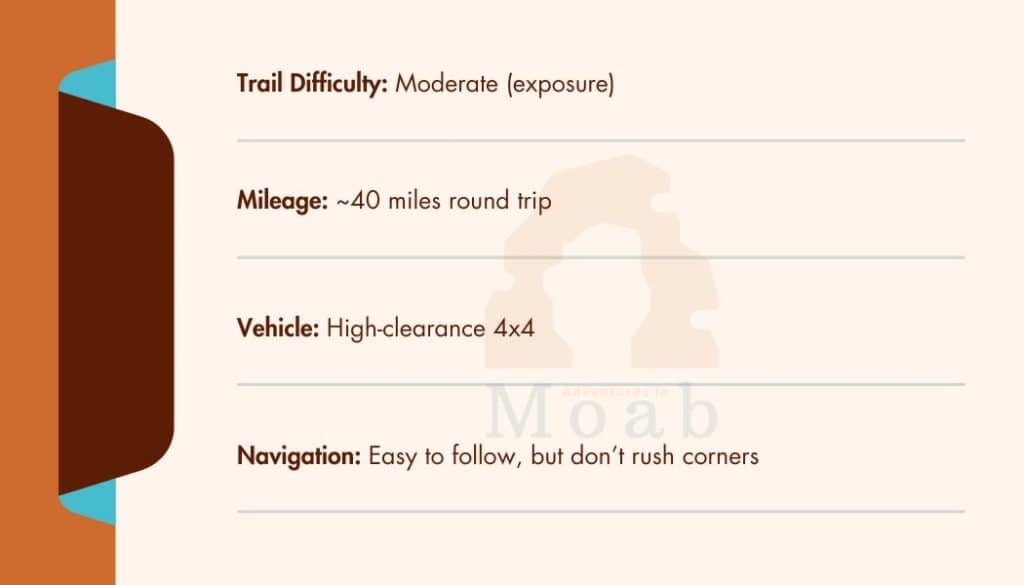
- Route: Kane Creek Blvd to Hurrah Pass, then on to Chicken Corners
- Viewpoints: Colorado River bend, Dead Horse Point across the way
- Lunch: Pack in — no services
- Add-ons: Jackson Hole or hike to Birthing Rock (respect closures)
- Sunset: Back in town or along Kane Creek pullouts
Arches NP & Sand Flats Exit (Day 7)
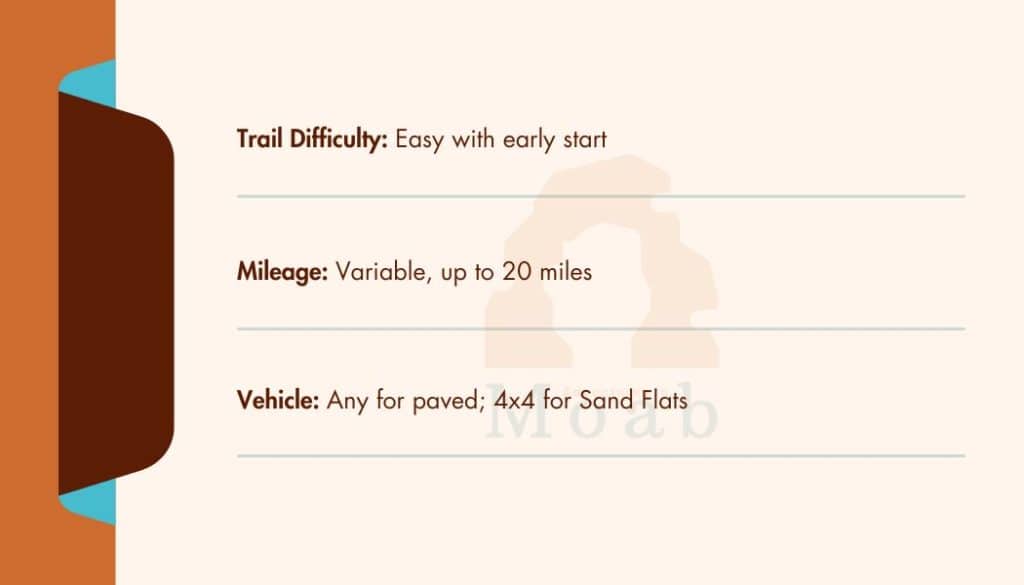
- Start Early: Enter Arches at sunrise (timed entry may apply)
- Key Stops: Delicate Arch (sunrise hike), Landscape Arch, The Windows
- Exit Option: Loop back via Sand Flats Road (gravel, scenic)
- Lunch: Sweet Cravings or Doughbird
- Wrap-up: Gear rinse, gift shop, gas up
Sunset Viewpoints Worth Planning For
- Dead Horse Point (Day 1)
- Kane Creek Pullouts (Day 3 or 6)
- Potash Road Boat Ramp (Day 4)
- Wilson Arch (Day 5)
Safety, Permits & Trail Etiquette
- Navigation: Download maps ahead of time (no service on trails)
- Recovery: Bring tow straps, full-size spare, jack, and know how to use them
- Leave No Trace: Pack it in, pack it out. Don’t bust crust!
- Season Tips:
- Spring/Fall = best temps
- Summer = scorching; avoid midday trail runs
- Winter = icy in shade, check conditions
- Spring/Fall = best temps
Accessibility Note: Most trails require physical mobility; Arches NP and town walks offer paved alternatives
Packing Checklist
- High-clearance 4×4 vehicle (rental or own)
- GPS app (Gaia, onX Offroad)
- Water (1 gal/day/person min)
- Food/snacks
- Sun protection (hat, UPF layers, sunscreen)
- Paper maps/printed itinerary
- First aid kit
- Recovery gear (strap, shovel, tire repair)
- Cooler + dry bag
Suggested Table: Daily Breakdown
Moab 7-Day Itinerary FAQs
What’s the best time of year for this Moab 7 day itinerary?
Spring (March–May) and fall (September–October) offer the best weather. Summer is extreme; winter is quiet but can be icy.
Do I need a permit to drive these trails?
Most trails don’t require permits unless you’re dispersed camping. Arches NP may require timed entry (check NPS).
Can I do this in a rental Jeep?
Yes. Moab has several off-road rental outfits. Choose one that allows Hell’s Revenge and provides recovery gear.
Are these trails beginner-friendly?
Day 3 and 6 routes are beginner-accessible. Hell’s Revenge is more advanced—skip optional obstacles if unsure.
What if it rains?
Avoid slickrock trails when wet. Substitute paved drives or easy hikes like Fisher Towers.